Friday, June 21, 2013

Girly Bits? SQUEEEEEEEEEEEEEEEEEEEEEEEEEEE!!!

Hello Dahlings!
 
Our tale today started nigh on 5 months ago. My DPD Swishie sent me a birthday box of polish goodies back in February. Alas, somewhere 'tween da Royal Mail & da USPO da package went walk-a-bout. Le sigh...great sadness on both sides of da Atlantic.
 
So what does my DPD do? She decides to send me a 1 year Blog-o-versary pressie! IThis time she played it safe by ordering from Harlowe & Co. (They're in Canada, but ship to da USA.) What did she send me, you ask?
GIRLY BITS!!! SQUEEEEEEEEEEEEEEEEEEEEEEEEEEEEE!!!
 
I couldn't decide which I wanted to wear first, so I decided to wear both!
 
 Da line up: Girly Bits Hot Shot & Twitterpated plus Layla Ocean Rush.
 
 Here's a close up of Hot Shot. Da linear holo effect is rather subdued & golden, but it was surprisingly opaque & it's a fabulous shiny, shimmery, bubble gum pink!
 
This is Twitterpated up close & personal. A strong linear blue violet holo with pink micro flecks! Ain't it gorgeous? I love it so much I had to put it on my toes, so I could enjoy it longer! (I promise, no feet pics! lol) If da light is too dull to show off da holo goodness, da blue violetness with teeny tiny pink bits is a grand alternative. Da only down side & it's a tiny one, is that its a wee bit sheer & needed 3 coats for opacity.
 
Ta Da! I got so excited while doing this mani that I forgot to take a base color pic. Blerg! I started with 2 coats of Hot Shot on my pinky & index; 3 coats of Twitterpated on my ring & thumb plus 2 coats of Ocean Rush on my middle. OR was a royally patchy pita to put on my nails! It showcased how smooth & issue free da Girly Bits are when applying them. I then added skinny stripes on pinky using my Essence skinny striper brush, a pseudo camouflage on ring using a very thin short detail brush, a gradient on middle using a bit of sponge, leopard spots on index using a dotting tool & chevrons on thumb using French Tip sticker forms. I sealed all da holo goodness in with a coat of Seche Vite.
 
Ain't my DPD Swishie da bestest? You bet your last bottle of polish she is! <3 font="">
 
Thanks for stopping by & don't forget to enter my Blog-o-versary Give-a-way!
You can't win one of da 5 polish bundles if you don't enter!
~ Inky
 

Wednesday, June 19, 2013

Wierd Wednesdays ~ Convention Test Nails #2

Hello Dahlings!
 
My polish daughter, Miss Swishie, reminded me last weekend that I hadn't done any Stampin' Up! Convention nail tests in awhile. Da sucon is only 4 weeks away so I  probably should do some more testing cuz I haven't decided what polishes to use yet. I'm going with a bright gradient in pink/purple/blue to match my hair with rhinestones spelling out da company name on my fingers & '25' on my big toes. Yep! I'm doing a pedi to match my mani!
 
I needed to do my June Polish Days manilast Sunday & I wanted to do some sucon testing, but I have a really hard time doing my nails, then taking da polish off as soon as I'm done so I can do another design. (This is why you don't see swatch posts from me, I refuse to spend hours polishing & removing said polish over & over.)
So I had to get a wee bit creative...
 
 Da line up: Orly Snow Cone, Ruby Kisses Electric Purple, Orly Va Va Voom
& Kleancolor Silver Star
 
WARNING!!! WARNING!!! WARNING!!!
You are about to enter a pedi zone!!!
 
 
 Meet my chubby lil piggies: pinky & big have Va Va Voom,
ring & index have Electric Purple, middle has Snow Cone.
All colors are 2 coats.
 
Big piggy got the gradient then all 5 got a coat of Silver Star. (which I forgot to take a pic of) What I learned from this is that I'm going to have to wear white undies if I want my nail color to POP.
 
I promise you won't see my piggies again for a long while.
This was a polishing emergency!
 
Thanks for stopping by & don't forget to enter my Blog-o-versary Give-a-way!
~ Inky

Monday, June 17, 2013

Monday Quickie ~ I've Cracked!

Hello Dahlings!
 
Today's quickie is all about da CRACK! I know many peeps think cracking polish is passé, but I liked da crackle effect used in art & home décor for many years before it was brought into da realm of nail art. So I have lots of crack polishes
& will use them 'til they're gone!
 
 Da line up: Ruby Kisses Pitch Black Darkness, China Glaze Glam-more Crackle Glaze, Claire's crackle polish & China Glaze Gleam Me Up Crackle Glaze.
 
Ta Da! Simple sparklies for a sunny day. I started with 2 coats of PBD.
Pinky & index have Glam-more, ring & thumb have Claire's
& middle got Gleam Me Up.
 
Thanks for stopping by & don't forget to enter my Blog-o-versary Give-a-way!
~ Inky

Sunday, June 16, 2013

Does It Stamp? ~ red, orange, green & teal

Hello Dahlings!
 
Today's Does It Stamp? covers some polishes recently acquired 
or over looked da 1st time thru my stash.
 
 
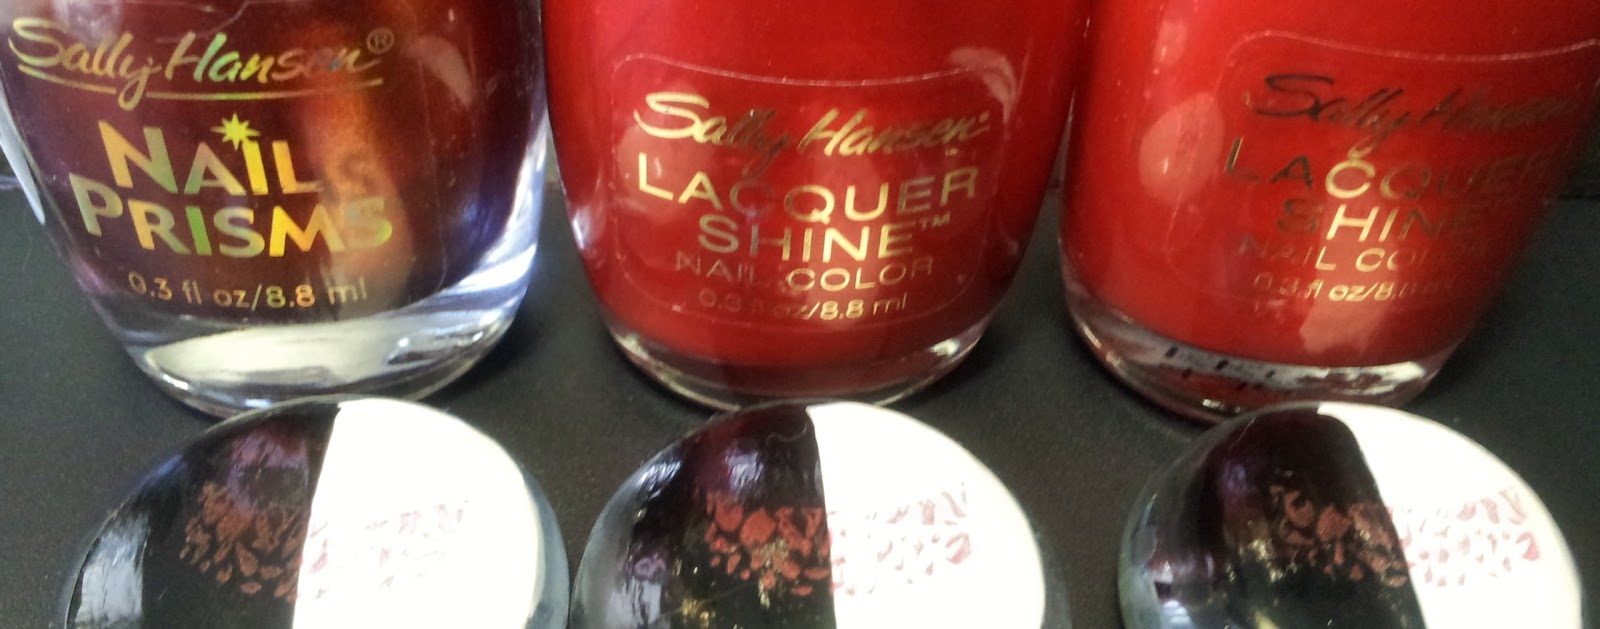
Reds ~ Sally Hansen Scarlet Ruby, Luminous & Radiant
 
Golden Tourmaline
 
Oranges ~ Sally Hansen Bright & Coral Amber
 
Greens ~ Sally Hansen Glow, Pure Ice Free Spirit & Ruby Kisses Tropical Green
 
Teals ~ Wet N' Wild Caribbean Frost, Wet N' Wild I Need A Refreshmint
& China Glaze Deviantly Daring
 
Thanks for stopping by & don't forget to enter my Blog-o-versary Give-a-way!
~ Inky


Friday, June 14, 2013

Punky Party Nails w/OOTD!

Hello Dahlings!
 
Mr Inky & I aren't big party peeps. When we do go to a party it's usually a work related thing for Mr Inky where making an appearance is somewhat political. (show up or we won't think you're a team player lol) So last Saturday we went to a 'team building' bbq at da bosses house. Mr Inky's boss is really cool, so going to his house isn't as bad as some of da other work parties we've been to when he worked other places. This is da same boss who's Day of da Dead party I wore this mani to last November. I knew it would be a mildly warm day & decided to wear a jumper I've had for nigh on 20 years & still love.
I wanted my nails to co-ordinate.
 
 
This is a pic of da back of da jumper I wanted my nails to match.
 
Da line up: Ruby Kisses African Violet, Silver Bling & Pitch Black Darkness plus Sinful Colors Watch It Shine along with my smallest dotting tool.
(not shown are my skinny striper & Milani Glosse Top Coat)
 
This is 2 coats of African Violet.
 
I did a double line French tip with Pitch Black Darkness & Silver Bling (I used my skinny striper to add da silver lines) then added a coat of Watch It Shine. I had to fish a bit for da lil rainbow holo diamonds, but it wasn't too difficult.
 
A close up of Watch It Shine for you. It's base is kinda murky looking in da bottle,
but it dries clear. Look at all da pretty rainbow colors!
 
I then made 2 decals using this image off Fab Ur Nails Fun 1 plate. I painted swatches on plastic using da Milani then stamped da image using Pitch Black Darkness. I colored them in using da smallest dotting tool I have (it has a point rather than a ball)
& African Violet, Silver Bling & Pitch Black Darkness.
 
TA DA! I applied my decals using da Milani tc then added some pink iridescent hearts over da stamped heart eyes using da Milani as glue. 
I sealed it all in with a coat of Seche Vite to finish.
 
I think this turned out so cute!
 
My accessories I wore with my outfit & spiffy mani. Da earrings are from Claire's, da watch was a 'buy $, get this free' from Sally Beauty Supply
& da bracelets are from Born Pretty Store.
 
A word on da bracelets...I knew when I read da product info they would be too small for my wrists, so I ordered 3 silver & 3 black then cut da elastic they were strung on so I could reconfigure da beads into bracelets that would fit. I got a package of pretty colored elastic in da kids' craft section of my local craft store & dug out da dental floss threaders I got at da drug store for beading & made 5 bracelets that fit plus I had enuf beads left over to make a barrette too. (I still have to glue those beads to a hair clip.) If you have average to thin wrists, these bracelets will fit you just fine, if you're big boned &/or well padded like me, restringing them is easy.
 
Thanks for stopping by & don't forget to enter my Blog-o-versary Give-a-way!
You can't win if you don't play!!!
~ Inky 


Thursday, June 13, 2013

Weird Wednesday ~ Shimmer Paint!

Hello Dahlings!
 
I'm sorry this is a day late, but my interweb took a vaca & didn't even send me a post card! A whole day with no puter or phone is TORTURE! I got lots of house work done, but was bored out a my inky lil skull.
 
This week's adventure into da weird is about Tsukineko All-Purpose Ink It comes in a bazillion colors (ok...46, but that's still a lot!) & can be used for all kinds of crafting. Da lil jars say 'Suitable for all porous surfaces such as paper, fabric, wood, leather and many others...' Stampin' Up! carried it under da name 'Shimmer Paint' until da end of May, when it was retired from da catty. I wanted to see if I could use it for nail art since I wouldn't be using it for work anymore.
 
 
Da line up: Sally Hansen Black & Blue plus Tsukineko All-Purpose Ink in Bright Copper,
plus my skinny striper & very tiny detail brushes.
 
This is 2 coats of Black & Blue. It looks like a blackened blue in da bottle, but it shifted between blue teal & green teal depending on da light. If I looked at my nails from an acute angle, da black base color showed.
 
TA DA! My 1st tribal mani & da ink works very well, thank you very much. It has a paint like consistency & is water soluble, like acrylic paint. I made a few booboos while painting & I just cleaned da brush off in water, dabbed off da excess water on a paper towel & wiped da ink off from where I didn't want it to be on my nail. I also cleaned it off my skin this way & found that it's much easier to clean up before it dries. This ink isn't polish soluble, so it handled having a top coat of Seche Vite no prob. However, not only isn't it polish soluble, it isn't acetone soluble either. I use a small soak jar with a sponge to get my polish off. Taking this off that way was leaving shiny lil chunks of copper paint floating in da acetone & sticking to da sponge. I found soaking my nails until da top coat was off, wiping my nails with a paper towel to get da ink off then soaking off da rest of da polish worked well. Cotton balls with polish remover or acetone should also work well. Acrylic paints are much cheaper than these inks, but if you have them already or find them on sale in a craft store, they work very well for nail art.
 
One more pic of da yummy duo-ness of Black & Blue.
 
Thanks for stopping by & don't forget to enter my 1 Year Blog-o-versary Give-a-way!
~ Inky


Monday, June 10, 2013

Polish Days ~ To Boldly Go...

Hello Dahlings!
 
It's that time of month again...Polish Days! This month's theme is: To Boldly Go...
 
We had da option of going for SciFi or SciFact (or sci-real as Hannah called it) or mixing it up however we desired. So I started pondering & this is where my Inky lil brain went...


Line up #1: Finger Paints Brushstroke Blush, Orly Crush on You, Interference Red & Blue (frankens made by me), & Kleancolor Silver Star.
(not pictured: Finger Paints Black Expressionism & Paper Mache')
 
I started with 2 coats of Paper Mache' on my middle finger. Then I painted 3/4 of that nail with Crush on You & da other 1/4 with Brushstroke Blush. I took a bit of sponge with both colors painted on it & softened da demarcation line between these colors.
 
I moved on to 2 coats of Black Expressionism on da rest on my nails then used a tiny bit of sponge to add swathes of interference red & interference blue to add a sort of nebular-ish look.
 
Next I added a coat of Silver Star to all da nails. Da lil silver holo bits & stars gave me bright points of light in my night sky & added a bit o' bling to da odd nail out. That odd nail has a purpose...
 
Doraemon! I've heard this cat has had some wild space adventures. I'm not really into Manga, but my musings for this challenge lead me to this nail stamping plate:
 
This is QA14 & you can buy it from Born Pretty Store
I used this image to make a DIY decal. I used da tiniest dotting tool tip (shown above) to paint in da image.
 
Line up #2: Finger Paints Black Expressionism & Paper Mache', Wet N' Wild Red Red
& Orly Snowcone. (not pictured: Milani Glosse' top coat)
 
TaDa! Not da best stamping, but I was really happy that it came out a well as it did. I trimmed off da excess clear polish around da image & used a thin coat of Glosse' to attach da decal. You can learn all about how to make your own nail art decals from Missy at Gnarly Gnails I finished with a coat of Seche Vite.
 
Much thanks to Hannah at Polly Polish for being so brilliant with da themes
& hosting this challenge!
Thanks for stopping by & don't forget to enter my Blog-o-versary Give-a-way!
Please go check out da other Polish Days players!
~ Inky